
Image courtesy of John Poffley
One Raw #6
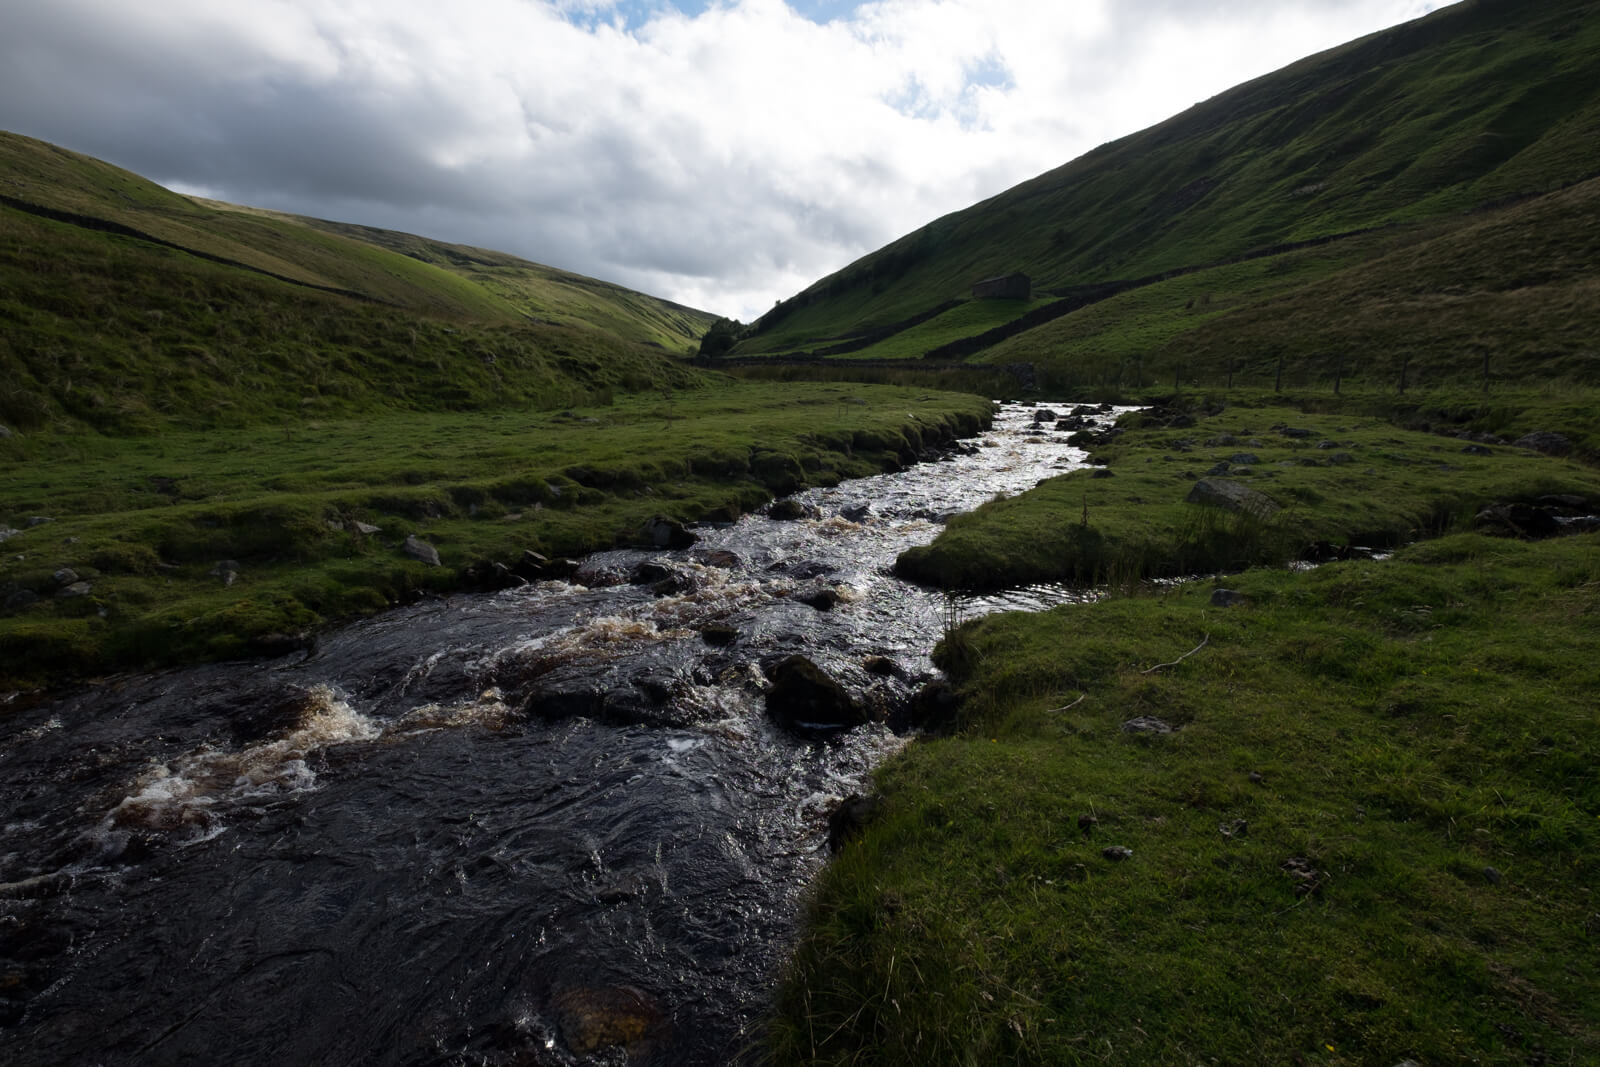
The concept of One Raw is simple – Three photographers receive the same RAW file and are asked to edit it however they see fit using Adobe Lightroom only.
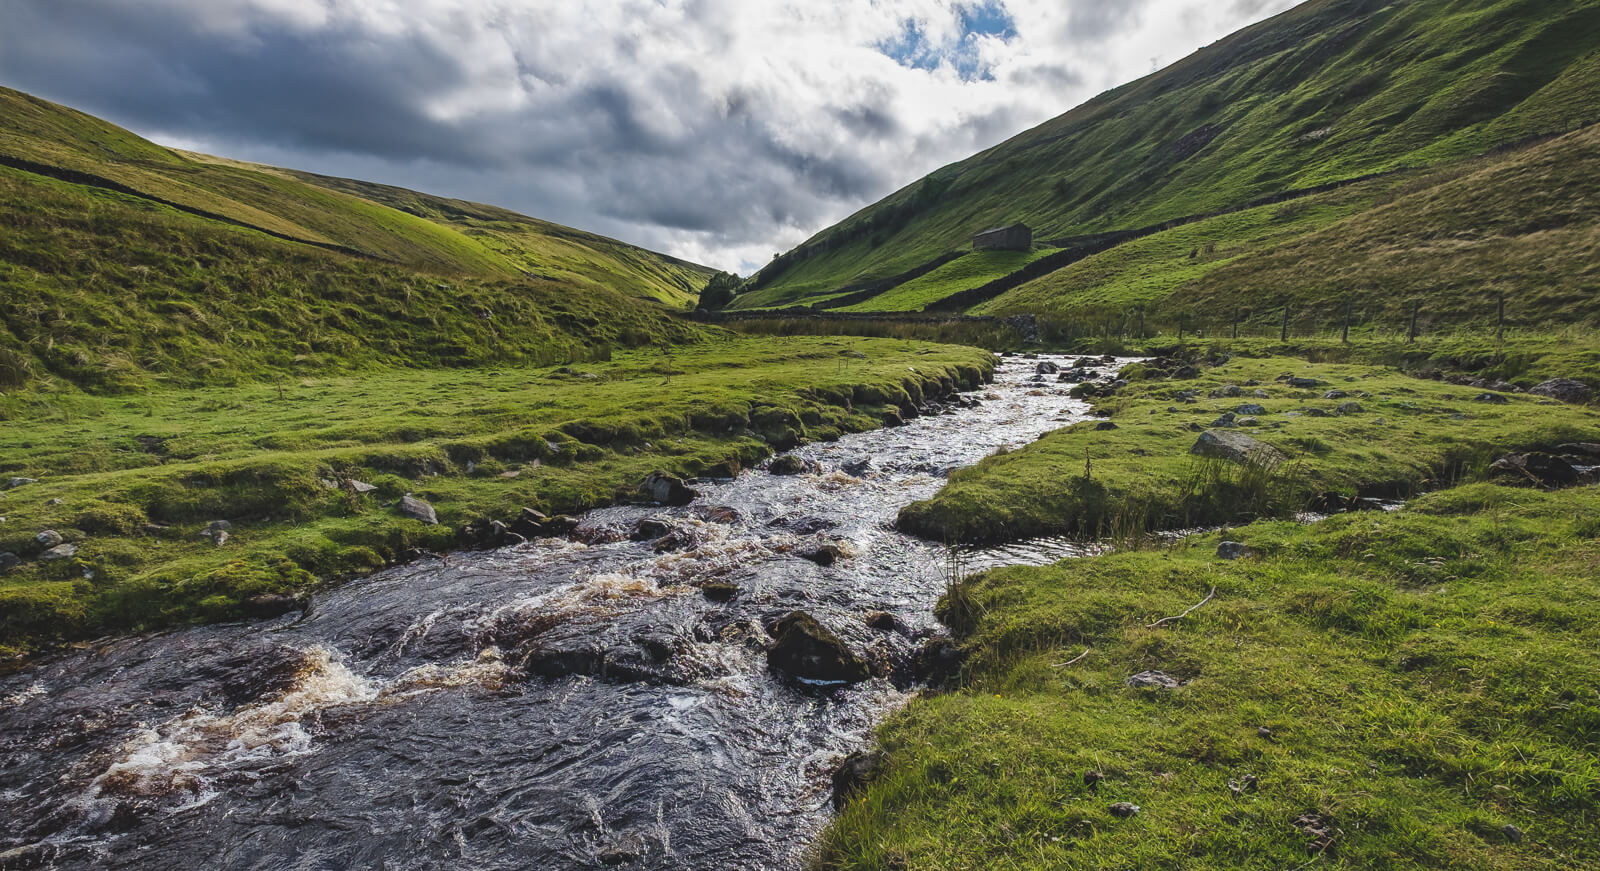
Our image this time comes courtesy of John Poffley who kindly edited for us back in One Raw #4 and features a stream cutting through the landscape. Our editors this time round are Leigh Gallant, Louis Goldman and Martin Kowalski.
So, one RAW file, three photographers. Let’s

Leigh Gallant
Leigh is a keen Amateur Photographer who only picked up his first serious camera in August 2015. He enjoys most styles of photography but Wildlife, Travel and Portraiture are what he enjoys the most. Photography allows him to take his mind off work and become creative be it out in the field or behind his computer in editing.
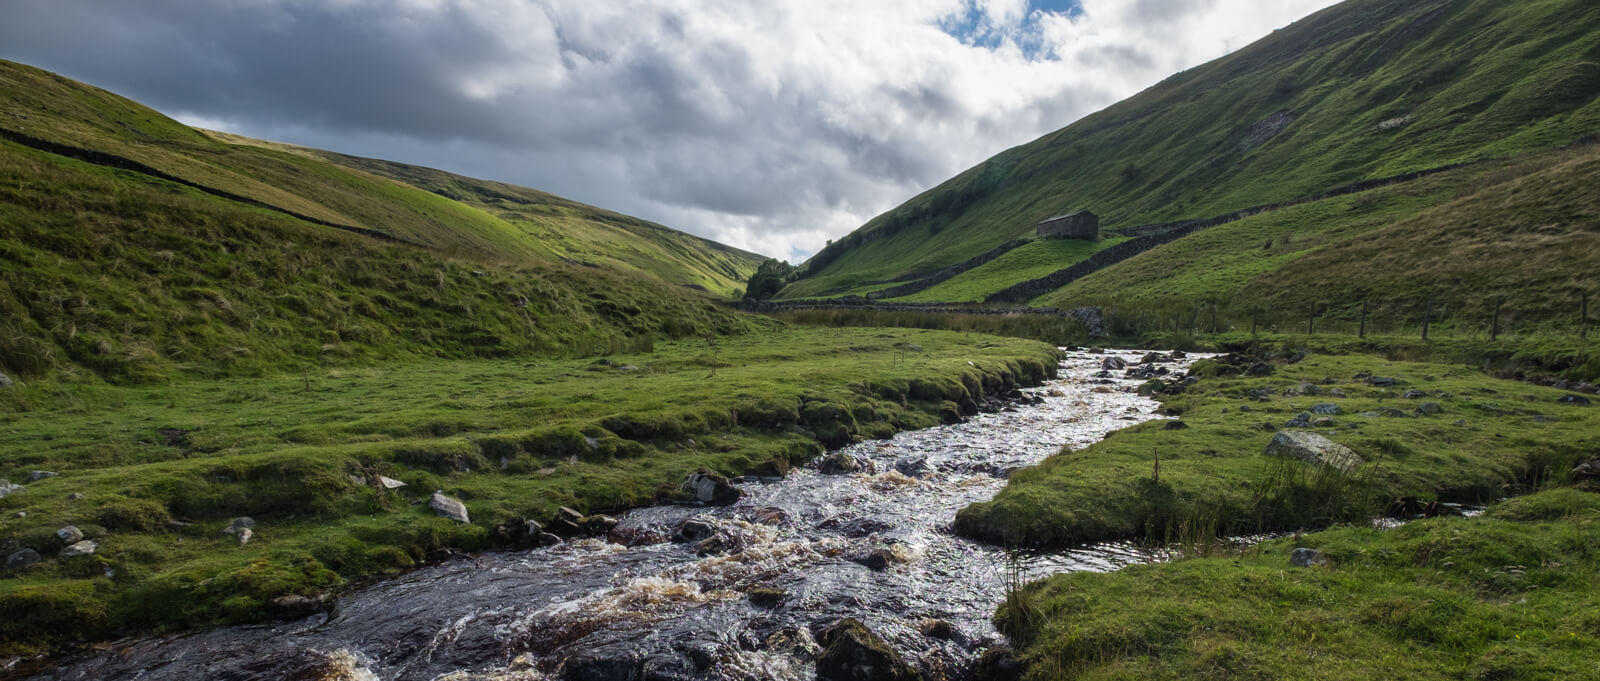
I usually start an edit with the lens correction enabled. I found the image a little too heavy on both foreground and sky so my thoughts ran to reducing both via a more “letterbox” styling. With this crop in mind I thought the image with the stream leading out from the bottom corner into the middle of the frame which then led the eye into following the stone wall into the valley and through the image nicely.
Using the highlight and blacks clipping indicators on the histogram I used the shadows, highlights and black sliders to bring all those within the parameters of the histogram (with no clipping either side).
I then added a small amount of clarity to make the overall image just a little cleaner. I used the clone tool to remove the distracting twig at the bottom of the image and then added a little more vibrancy to brighten the green in the grass.
I added a Light graduated filter to the sky and the left hand hillside adding just a small amount of dehazing to darken the sky coming over the hill but also brightening the hillside in keeping with the obvious light source of the image.
I added a radial filter around the building on the hillside and brightened up the shadows minimally with again some clarity to make it stand out a tad more.
Personally I like the harsh nature of rough rocks to look just that so used a adjustment brush to paint over those with some clarity and raised shadows to just make them “pop” a bit more.
At this point on review I found the image looked a tad dark so went back and raised the exposure slider to brighten up the overall image which then left me with something I was ultimately very happy with.
I really enjoyed the exercise, it’s very interesting to see how different people view the same scene, may thanks to Simon for the hard work that goes in to make this project what it is!
Drag the slider above to show before/after.
Basic
Tone
Presence
Tone Curve
Region
HSL
Hue
Saturation
Luminance
Color
Red
Orange
Yellow
Green
Aqua
Blue
Purple
Magenta
Black & White Mix
Split Toning
Highlights
Shadows
Detail
Sharpening
Noise Reduction
Effects
Post-Crop Vignetting
Grain
Dehaze
Camera Calibration
Shadows
Red Primary
Green Primary
Blue Primary
Louis Goldman
Louis is an electrical and electronic engineering student with an incredible passion for photography. He's been doing photography for about 5 years and over the past year has begun to build up his own business taking on small commercial photography jobs. He loves landscape and event photography and has recently begun making short travel films.
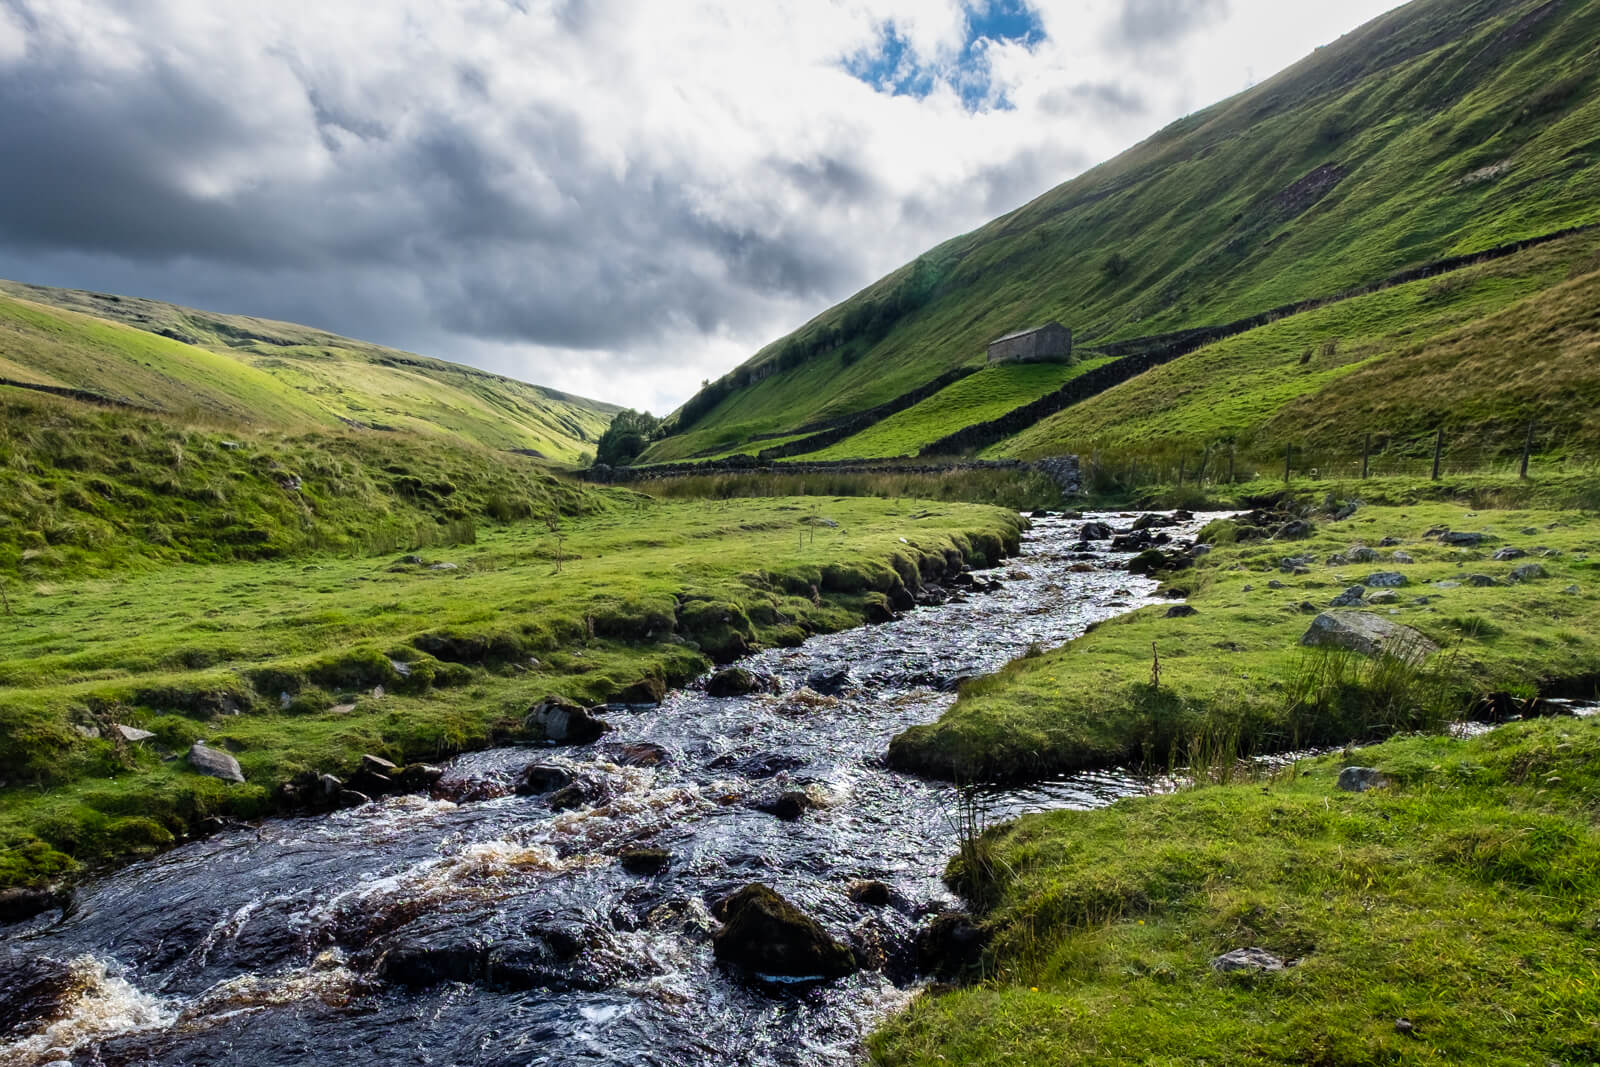
When I first opened this image, I knew that I wanted to try and create a path through the photo as if a hiker was following this river.
Before I started I used the spot removal tool to remove some small twigs that were in the foreground I thought to be a distraction. I also enabled profile corrections to remove any chromatic aberrations and remove any distortion in the image. Sometimes using a wide-angle lens can have significant distortion. Not knowing which lens had been used I cycled through a few of Lightroom’s guesses as to what lens was use. I ended up using the profile for a Rokinon 12mm f/2 lens. This photo was taken at 10mm, so I knew this wasn’t the ‘correct’ settings however it was close to the result I wanted.
I then moved onto the basic adjustments bringing up the exposure, turning down the highlights and the blacks while boosting the shadows, whites and contrast. I quite often like to create lively images with a high dynamic range, so I added a little bit of clarity to the photo and some vibrancy. I also added a tiny amount of saturation just to help the colours pop a little. I also set the tone cure to medium contrast to extenuate the colours more.
After my initial adjustments, the hill on the right-hand side was looking to be a little washed out so I used the adjustment brush to bring down the exposure and increase the contrast and blacks. This brought the detail back into the hill however it made the hut too dark. As a main feature of my journey through the picture I used a second adjustment brush to bring the exposure back to what it was before and added a bit more contrast to the building.
I then decided to crop the image slightly as I felt the river was too prominent and I used the transform tab to negatively stretch the image on the vertical axis. Doing this also made the hut a bit more prominent. Having no visible horizon in the photo it was difficult to tell if the image was straight or not. Therefore, instead I used the spirit level tool on the line of water at the top of the river.
At this stage the river was looking over exposed. I used the combination of an adjustment brush and a graduated filter to reduce the exposure and add more contrast to the river. I also thought the river was a little too green, so I used the temperature slider to bring some more blue into the image.
I then moved to the end of the image where the valley moves off around the corner. I wanted to create a setting that would draw the viewers eyes here. I decided to darken the sky using a graduated filter which added contrast between the left hill and the sky. This formed a light at the end of the tunnel effect suggesting that the journey I intended to create throughout this photo continues.
To finish off the photo I added a bit of sharpening and some post crop vignetting.
Drag the slider above to show before/after.
Basic
Tone
Presence
Tone Curve
Region
HSL
Hue
Saturation
Luminance
Color
Red
Orange
Yellow
Green
Aqua
Blue
Purple
Magenta
Black & White Mix
Split Toning
Highlights
Shadows
Detail
Sharpening
Noise Reduction
Effects
Post-Crop Vignetting
Grain
Dehaze
Camera Calibration
Shadows
Red Primary
Green Primary
Blue Primary
Martin Kowalski
Martin is a big fan of photography and sky diving. In the future he'd love to be a professional aerial photographer and videographer. He loves Lightroom, but is fairly new to editing so was keen to get involved with One Raw and can't wait to compare his results with our other editors.
First thing, I turned on “Lens corrections”, then I cropped the image and rotated to make the photo straight. After that I made regular adjustments – white balance, exposure, highlights, shadows, whites, blacks etc.
The hardest thing for me was the sky. I spent 2 days trying various solutions. I decided to make it a bit dramatic and I used brush to do this.
I’m currently learning how to adjust via curves, so from the beginning I wanted to use this option during my edit. When I finished editing, I left the photo for a week, so my brain and eyes could rest. After I come back I decided to make some additional minor adjustments to vibrance and saturation.
Drag the slider above to show before/after.